Apps and Jobs

Fileglancer’s Apps feature lets you run command-line tools on the compute cluster without leaving the browser. An app is defined by a GitHub repository containing a manifest file that describes the tool’s commands, parameters, and resource requirements. Once added, you can launch jobs, fill in parameters through a form, and monitor their progress — all from the Fileglancer UI.
Why Use Apps?
Section titled “Why Use Apps?”Apps bridge the gap between viewing your data in Fileglancer and processing it on the compute cluster. Instead of SSH-ing into a cluster node, writing job scripts, and manually tracking output, you can:
- Launch tools with a few clicks — select an app, fill in parameters, and submit
- Use file and directory pickers — browse your data directly from the parameter form instead of typing paths
- Track job status in one place — see which jobs are pending, running, done, or failed
- View logs in the browser — read stdout and stderr without navigating the filesystem
- Relaunch with the same settings — quickly re-run a job with identical or tweaked parameters
Apps work with any command-line tool. Common use cases include image conversion pipelines (e.g. bioformats2raw), Nextflow workflows, data analysis scripts, and interactive services like JupyterLab.
Adding an App
Section titled “Adding an App”Apps are added by providing a GitHub repository URL (HTTPS or SSH). The repository must contain either a runnables.yaml manifest file describing the tool, or a recognized project format (Nextflow pipeline with nextflow_schema.json, or a Pixi project) that Fileglancer can auto-detect.
-
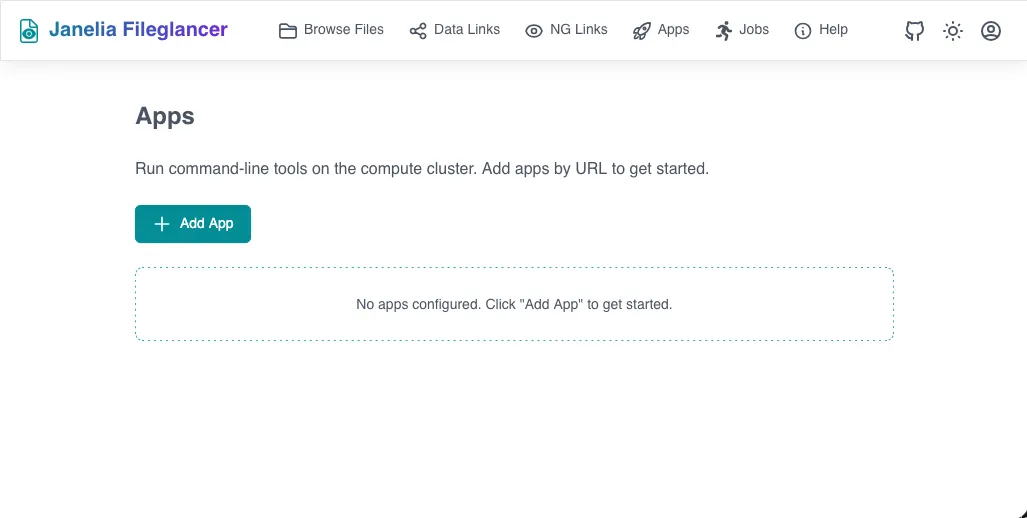
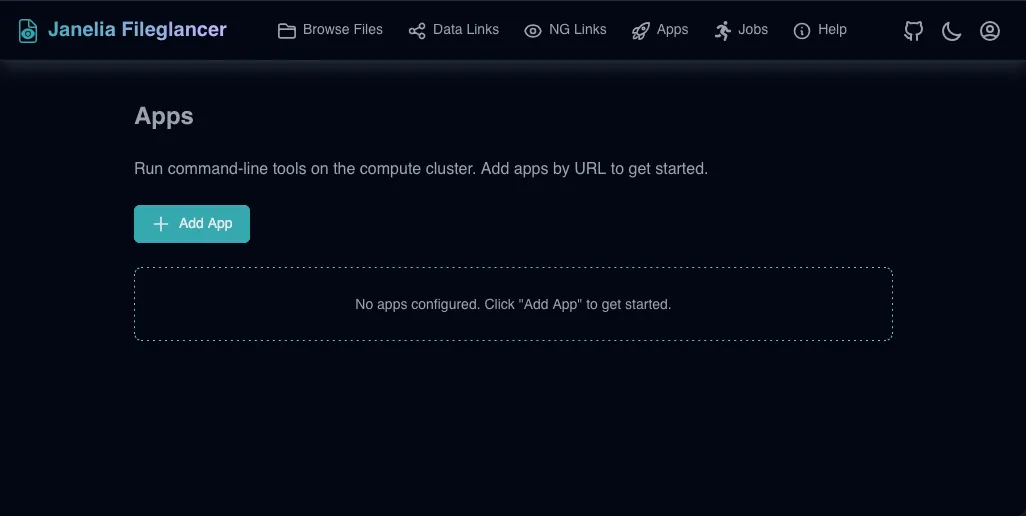
Navigate to the Apps page
Click Apps in the navigation bar to open the Apps page. -
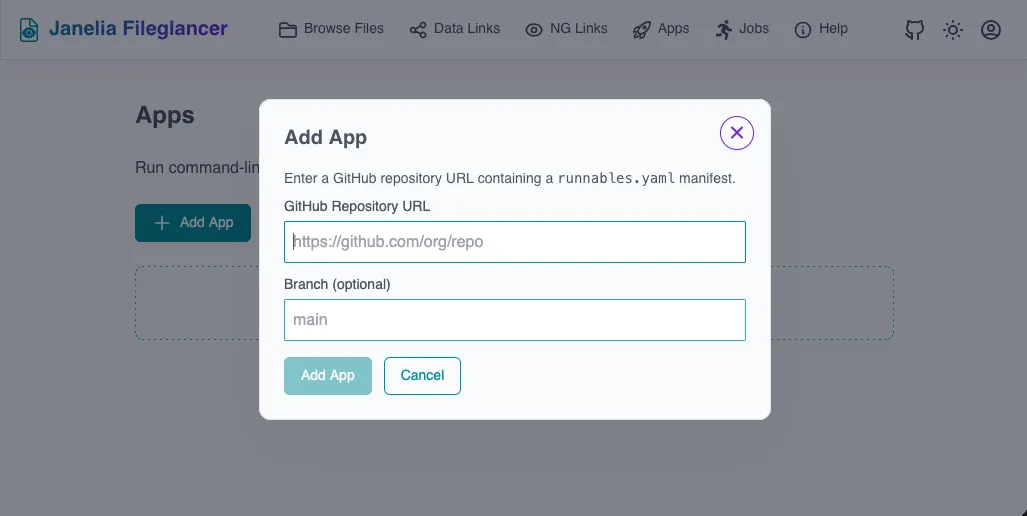
Click “Add from URL”
The Add App dialog opens with a field for the GitHub Repository URL and an optional Revision field (a tag or branch name). -
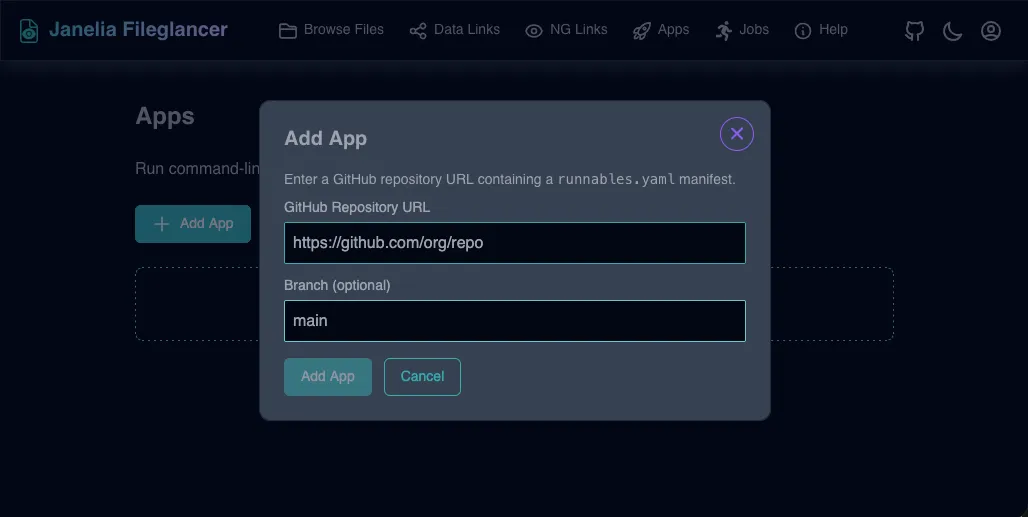
Enter the repository URL
Paste the full GitHub URL (e.g.https://github.com/org/repoorgit@github.com:org/repo.git). To pin the app to a specific tag or branch, fill in the Revision field as well. If you leave it blank, Fileglancer uses the repository’s default branch. -
Click “Continue”
Fileglancer clones the repository and searches for manifest files. If found, the app appears in My Apps. A single repository can contain multiple apps if it has manifests in different subdirectories — in that case you are shown the discovered apps and can choose which ones to add.The revision is fixed when the app is added: the exact tag, branch, or default branch resolved at add time is recorded, and the app is pinned to the exact commit at the tip of that revision. Every launch runs that same commit — even if new commits land upstream later — until you explicitly update the app. To track a different revision, re-add the app. See Updating an App for how to move an app to newer commits on its pinned revision.
What Fileglancer Looks For
Section titled “What Fileglancer Looks For”When you add a repository, Fileglancer first walks the entire directory tree looking for:
runnables.yaml— a manifest file that explicitly defines the app’s commands and parameters. Everyrunnables.yamlfound anywhere in the repository becomes a separate app.
If no runnables.yaml is found anywhere in the repository, Fileglancer falls back to auto-detecting a recognized project format at the repository root only:
nextflow_schema.json— a Nextflow pipeline schema, automatically converted to an app manifestpixi.toml(orpyproject.tomlwith[tool.pixi.tasks]) — a Pixi project, where each task becomes a launchable entry point
If you’re a tool author, see the Authoring Apps guide for the full manifest reference.
Launching a Job
Section titled “Launching a Job”Once an app is added, you can launch it as a job on the compute cluster.
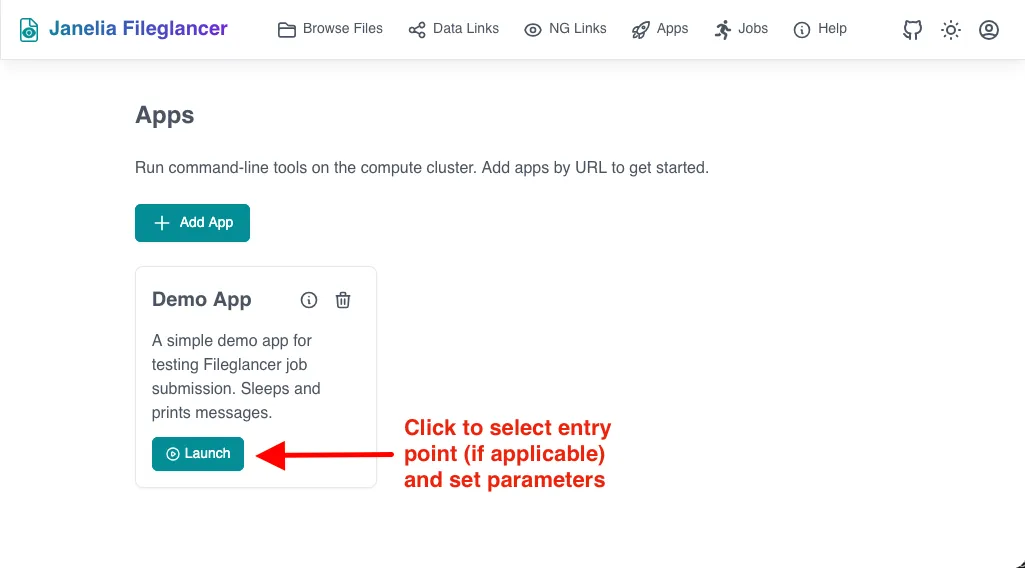
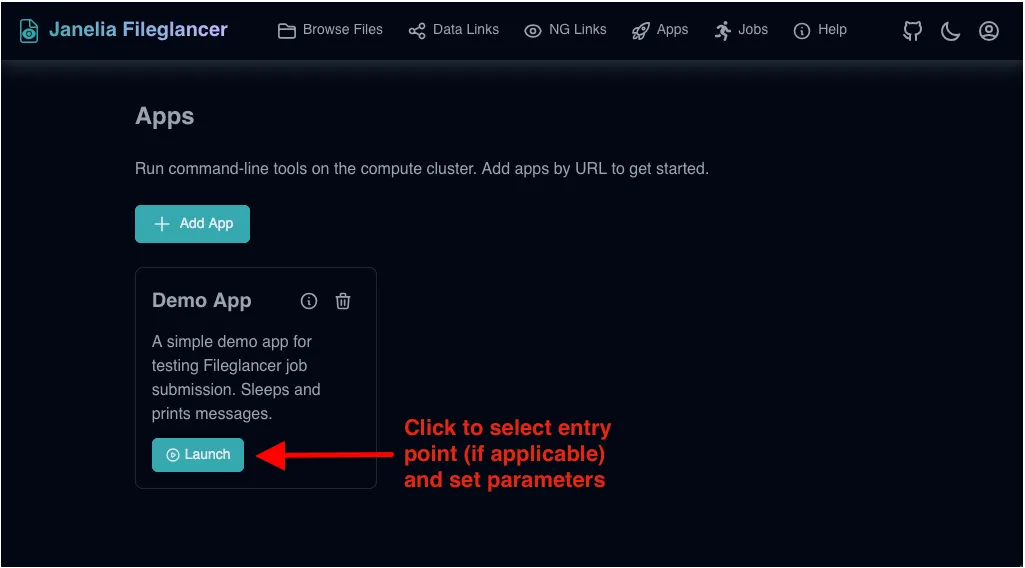
- Click “Launch” on an app card
The Launch button is in the banner at the top of each card. In table view, choose Launch from the row’s actions menu. You will either be prompted to select an entry point or the launch form will open immediately. Alternatively, click anywhere on the card (or the app name in table view) to open the app’s detail page, which has a Launch button for each entry point.
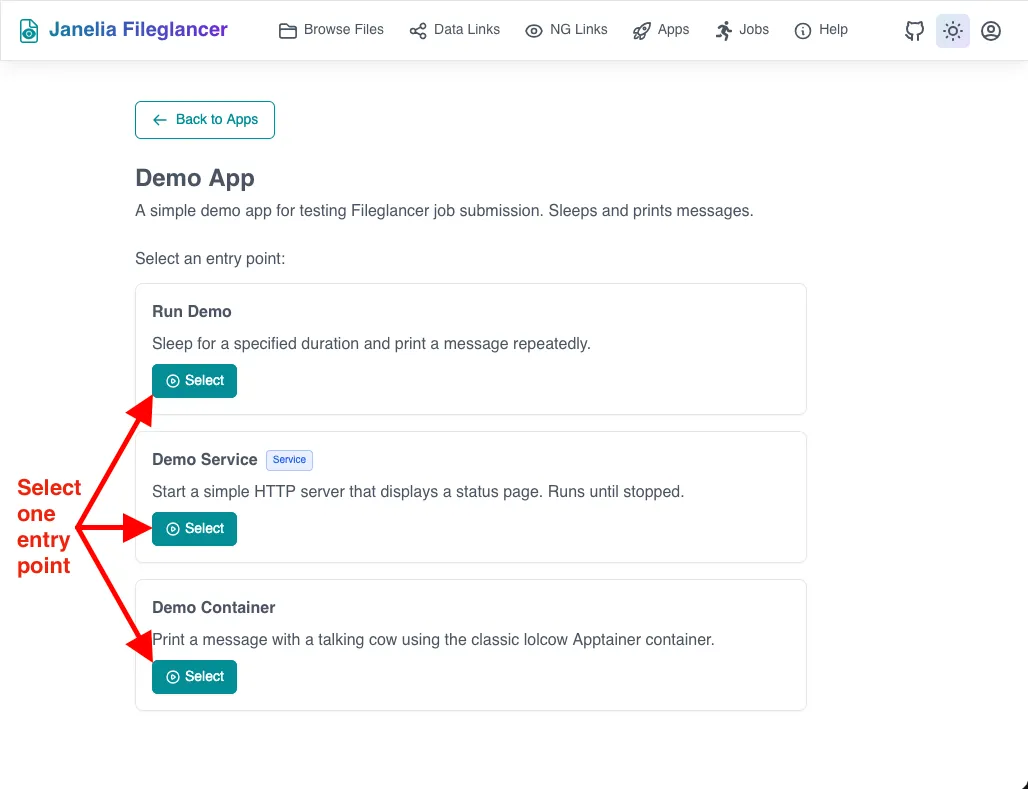
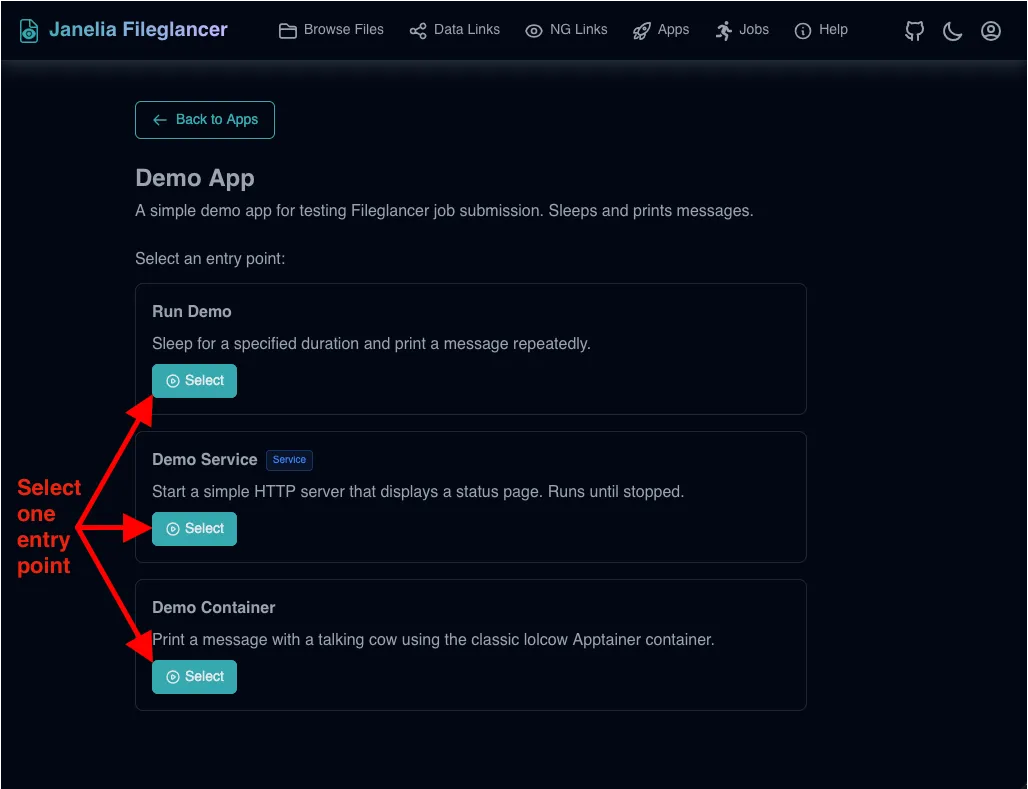
- If prompted, select the entry point to run
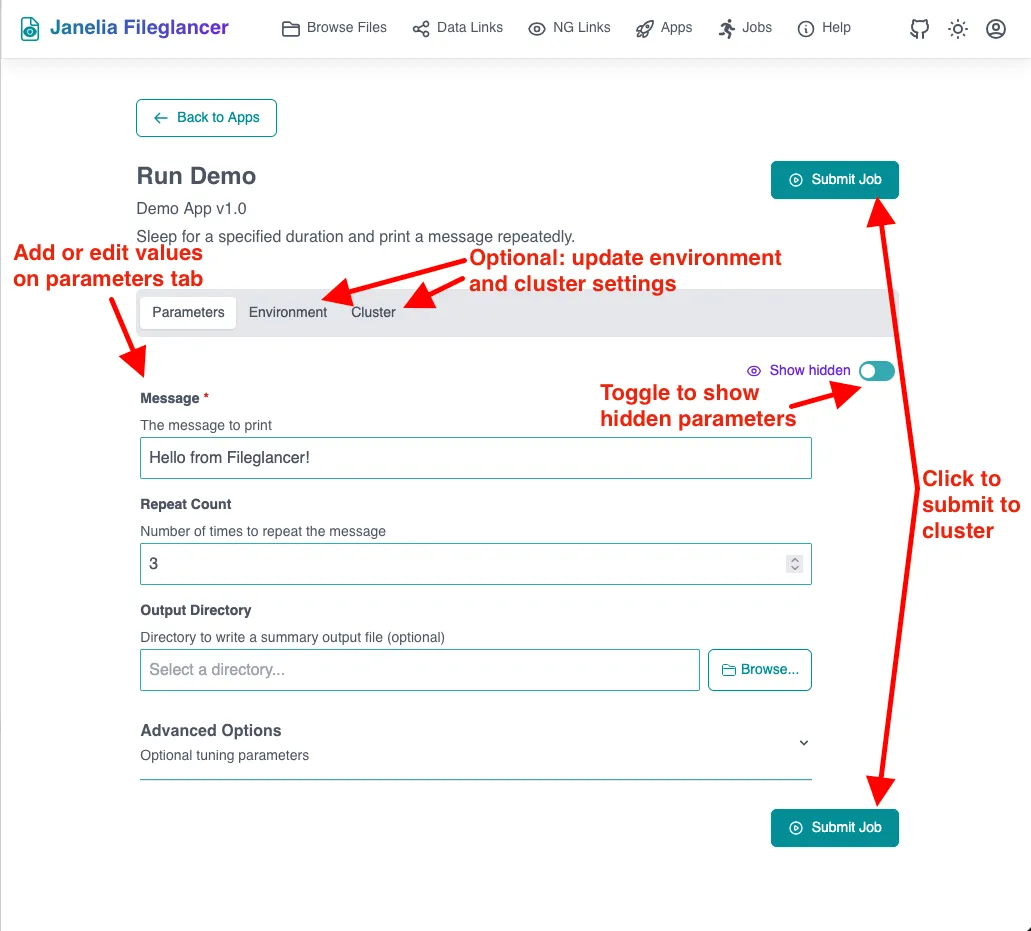
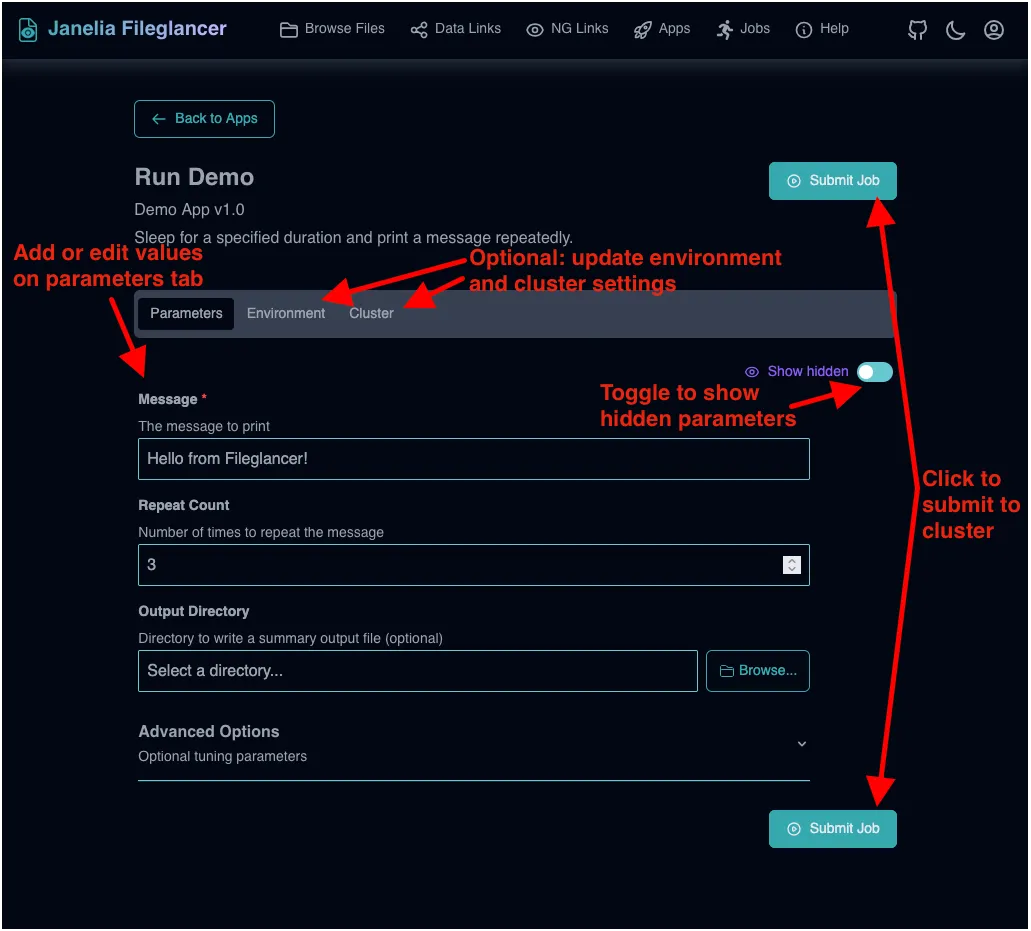
A single app can define multiple entry points (also called runnables) — distinct commands that serve different purposes but share the same repository. For example, the Fileglancer Demo App defines three entry points: “Run Demo” (a batch job that prints a message repeatedly), “Demo Service” (a long-running HTTP server), and “Demo Container” (a containerized command using Apptainer). Each entry point has its own parameters, resource defaults, and execution mode. When an app has multiple entry points, each one is shown as a card with its name and description. Click Select on the desired entry point to open its parameter form. Apps with only one entry point skip this step and go straight to the form. Launching a specific entry point from the app’s detail page also skips this step.
-
Fill in parameters on the launch form
The form shows the app’s parameters with their types, defaults, and descriptions. Forfileanddirectoryparameters, a browse button lets you pick paths from the Fileglancer file browser. Required parameters are marked and validated before submission. -
Review the cluster and environment settings (optional)
Switch to the Cluster tab to adjust CPU, memory, walltime, and queue requests, along with any extra scheduler arguments. The Environment tab lets you set environment variables, pre/post-run scripts, and tool-specific options like Nextflow profiles. -
Click “Submit Job”
Click Submit Job (or Start Service for a service entry point). The job is submitted to the cluster and you are redirected to the Jobs page. A toast notification confirms the submission.
Tips for Launching
Section titled “Tips for Launching”- Running the latest code: Each launch runs the exact commit the app is pinned to, so repeated runs are reproducible. If the app’s code is actively developed, watch for the amber Update available tag on the app’s card and use the Update button to move to the newest commit before launching (see Updating an App).
- Hidden parameters: Some apps have advanced parameters hidden by default. Toggle “Show hidden” in the Parameters tab to reveal them.
- Collapsible sections: Long parameter forms may group options into collapsible sections. Click a section header to expand or collapse it.
- Extra scheduler arguments: The Cluster tab’s extra arguments field is split like a shell command line, so you can pass several flags at once and quote values that contain spaces or brackets — e.g.
-P myproject -R "select[mem>8000]"for LSF. - Saving launch settings: Use Export params to download the current launch settings — Parameters, Environment, and Cluster tabs — as JSON. Upload params file restores any settings present in that file.
Monitoring Jobs
Section titled “Monitoring Jobs”All jobs launched from apps appear on the Jobs page, accessible from the Apps page navigation.
Jobs Table
Section titled “Jobs Table”The Jobs page displays a table with the following columns:
| Column | Description |
|---|---|
| App | Name of the app that was launched |
| Entry Point | The specific runnable that was executed (click to view details) |
| Status | Current job state: PENDING, RUNNING, DONE, FAILED, KILLED, or UNKNOWN |
| Submitted | When the job was submitted |
| Duration | How long the job has been running or ran in total |
| Actions | Menu with options to view details, relaunch, cancel, or delete |
Job Statuses
Section titled “Job Statuses”- PENDING — the job is queued and waiting for cluster resources
- RUNNING — the job is actively executing on a cluster node
- DONE — the job completed successfully
- FAILED — the job exited with a non-zero exit code
- KILLED — the job was cancelled by the user or terminated by the cluster (e.g. walltime exceeded)
- UNKNOWN — the scheduler cannot currently report the job’s status (for example, it aged out of the scheduler’s history). Unknown jobs are treated as still active: Fileglancer keeps polling them and you can still cancel them, but they cannot be deleted. A job that stays UNKNOWN past a server-configured cutoff (24 hours by default) is marked FAILED
Job Detail View
Section titled “Job Detail View”Click an entry point name in the jobs table (or select View Details from the actions menu) to open the detail view. This page shows:
- Header — app name, entry point, and status badge, with a back arrow that returns to the jobs list
- Overview tab — a summary of the job: its app (linked to the app’s detail page), entry point, the exact commit the job executed (Version, linked to GitHub), status, timestamps (submitted, started, finished, exit code), and resource requests
- Parameters tab — the parameter values that were used for this job
- Script tab — the generated shell script that was submitted to the cluster, with a link to the script file on disk
- Output Log tab — the job’s stdout, streamed in near-real-time while the job is running. Includes a download button
- Error Log tab — the job’s stderr, also available for download
Very large script or log files are shown truncated: only the most recent 5 MB is displayed, with a note about how much was omitted. To see the whole file, open it from the job’s working directory in the file browser.
From the detail view you can Relaunch the job, which opens the launch form pre-filled with the same parameters — including Environment-tab settings like Nextflow profiles — so you can re-run or adjust settings.
Deleting a Job
Section titled “Deleting a Job”Select Delete from a finished job’s actions menu to remove it. Deleting removes the job’s record and its entire working directory — the generated script, logs, and any files the job wrote there. A confirmation dialog warns you before anything is removed. Files the job wrote elsewhere (e.g. an output directory you chose as a parameter) are not affected. Active jobs (including UNKNOWN ones) must be cancelled before they can be deleted.
Services
Section titled “Services”Some apps define service entry points — long-running processes like JupyterLab, web viewers, or APIs. Services work like regular jobs, with a few differences:
- While a service is pulling a container image or starting, the detail view shows a progress banner
- Once the service is ready and has published its URL, a green banner appears with an Open Service button that opens the service in a new tab
- To stop a service, click Stop Service from the detail view or select Stop Service from the actions menu in the jobs table
Managing Apps
Section titled “Managing Apps”The App Detail Page
Section titled “The App Detail Page”Click anywhere on an app card to open the app’s detail page. It shows the app’s source repository, pinned revision, manifest path, app commit (linked to GitHub), and description; separate code repository details when the manifest uses repo_url; a card for each entry point with its own Launch button; and the app’s most recent jobs, linking to their detail pages. The page header has buttons for sharing and updating the app, and a back arrow that returns to My Apps.
Each app card or table row also has an actions menu (the vertical ”⋮” button) with quick access to Launch, View (the detail page), Share to Catalog/Unshare, Update, and Remove.
Updating an App
Section titled “Updating an App”If the source repository has been updated (e.g. new parameters added, commands changed), you can update the app with the Update button on its detail page, or Update in the app card or table row’s actions menu. This pulls the newest commits on the app’s pinned revision, re-reads the manifest, and pins the app to the new tip commit — the toast reports the new version (e.g. “Updated to a1b2c3d”) or “Already up to date”. Fileglancer periodically compares your pinned commits against the source repositories and shows an amber Update available tag on the app’s card and detail page when newer commits exist.
Updates are per-app. Every app is pinned to an exact commit, and jobs run from a private checkout of that commit, so updating one app never changes the code that other apps from the same repository run — and never affects jobs that are already queued or running; they keep executing the version they were submitted with. Updating also does not change which revision the app tracks — for a branch pin it moves to the newest commit on that branch, while a tag or commit pin has nothing newer to pull. To move an app to a different revision, re-add it from the new URL.
Removing an App
Section titled “Removing an App”Select Remove from the app card or table row’s actions menu (or from the ”⋮” menu on the app’s detail page) to remove the app from your library. This does not affect any jobs that have already been submitted — their data and logs remain available on the Jobs page. Code checkouts that no app or recent job references are cleaned up automatically in the background. If you have shared the app to the catalog, removing it from your library does not delete the catalog listing — unshare it first if you want to take it down.
Sharing Apps
Section titled “Sharing Apps”There are two ways to share an app with colleagues: publishing it to the shared App Catalog, or sending someone a direct launch URL.
The App Catalog
Section titled “The App Catalog”The Apps area has three tabs: My Apps (the apps in your library), App Catalog (apps shared by anyone on the server), and Jobs (your job history). My Apps and App Catalog can be viewed as cards or as a table; both views use the same actions menu.
To share one of your apps, click Share to Catalog on its detail page (or select it from the app card or table row’s actions menu). You can give the listing a custom name and description for the catalog — these only affect the catalog entry, not your own copy of the app. Once shared, the app is visible to every Fileglancer user in the App Catalog tab, and the card shows a green Shared tag.
To use a shared app, open the App Catalog tab, find the app (you can search by name, description, or who shared it, and hide apps you already have), and click Add on its card or choose Add to my apps from a table row’s actions menu. Clicking the card or app name opens the listing’s detail page, which shows the source URL, revision, manifest path, who shared it, its entry points (each with a Launch button), and an Add to my apps button. Every add path opens a confirmation dialog showing the source URL, who shared the app and when — along with a reminder that the app’s code runs as your user once launched. Adding copies the app into your own library — it tracks the same revision the publisher shared, pinned to that revision’s newest commit at install time — where it behaves like any other app you added.
After sharing, the publisher can still edit the listing — its name, description, repository URL, and revision — via the Edit button on the listing’s detail page or Edit in its actions menu. If the repository URL or revision changes, Fileglancer verifies that the app’s manifest still exists there before accepting the edit, so the catalog never advertises an app that can’t be added.
The publisher can select Unshare from the listing’s actions menu or its detail page to remove it from the catalog; a confirmation dialog is shown first. Unsharing only removes the catalog listing; it does not affect copies that others have already added to their own libraries.
Sharing by URL
Section titled “Sharing by URL”Apps can also be launched directly via URL without being added to your library first. If someone shares a launch URL with you, Fileglancer loads the app manifest and shows the launch form. A banner at the top offers to Install App to add it to your library for quick access later — for a multi-app repository, only the app you are viewing is installed, not every app in the repository.
Troubleshooting
Section titled “Troubleshooting”App fails to add
- Verify the GitHub URL is correct and the repository is accessible
- Check that the repository contains a
runnables.yaml,nextflow_schema.json, orpixi.tomlfile - If you pinned a specific revision, make sure the tag or branch name is correct
Job stays in PENDING
- The cluster may be busy. Check cluster load or try requesting fewer resources
Job shows Unknown status
- The scheduler can no longer report the job — it may have aged out of the scheduler’s history
- The job may still be running; check its output log for recent activity
- You can cancel the job to clear it. If left alone, a job stuck in UNKNOWN is marked FAILED after a server-configured cutoff (24 hours by default)
Job fails immediately
- Check the Error Log tab in the job detail view for error messages
- Review the Script tab to see the exact command that was generated
- Ensure file and directory paths used as parameters still exist and are readable
Service URL not appearing
- The service may take time to start. Wait for the status to change from PENDING to RUNNING
- Check the output and error logs for startup errors
- If the app does not use Fileglancer’s automatic service URL support, the service must write its URL to a specific file — check with the app author if the service doesn’t seem to publish its URL